
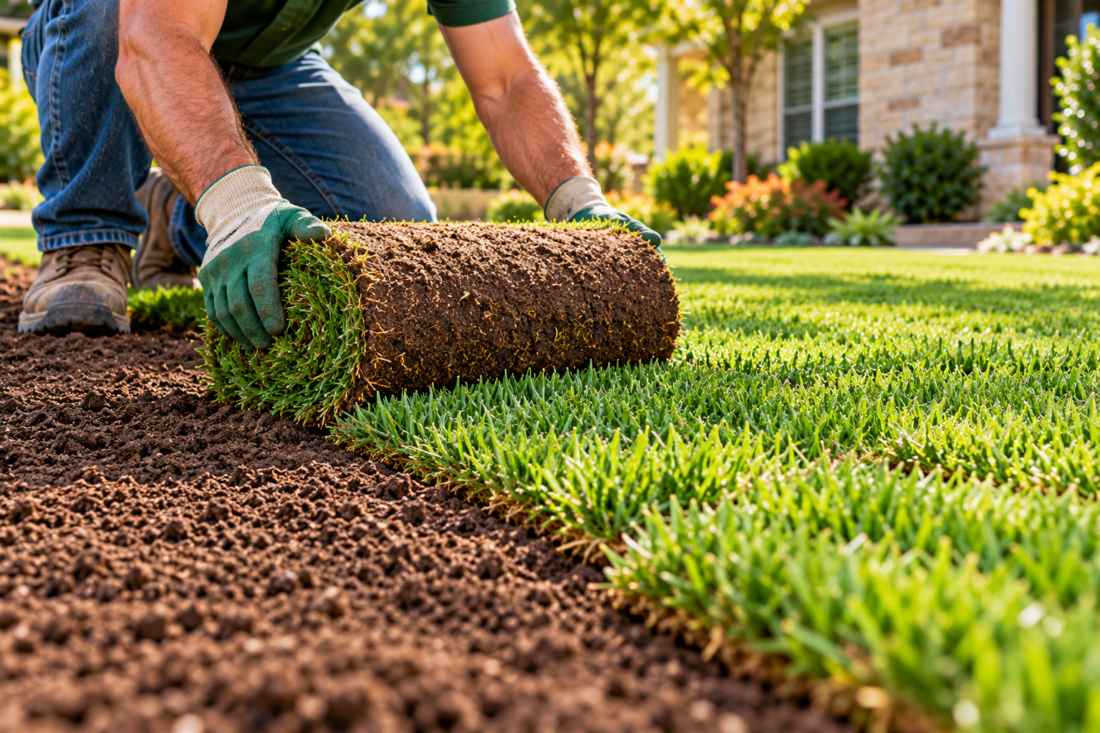
Installing sod is a great way to give your yard a fresh, green lawn without waiting for grass seed to grow. With proper soil preparation and careful installation, you can create a lawn that looks beautiful and has a strong foundation for healthy growth.
If you’re wondering how to install sod in your yard, the process involves more than simply laying down rolls of grass. You’ll need to remove existing weeds, prepare and level the soil, install the sod correctly, and water it regularly while the roots become established.
Follow these step-by-step instructions to learn how to prepare your yard for sod installation and lay new grass.
What You Need to Install Sod
Before you begin, gather the tools and materials you’ll need. Having everything ready will make the installation process easier.
Tools and materials:
-
Fresh sod
-
Shovel or sod cutter
-
Garden rake
-
Wheelbarrow
-
Rototiller or garden cultivator
-
Soil amendments or organic matter, as needed
-
Garden hose with a spray nozzle or sprinkler
-
Lawn roller, if available
-
Utility knife or sharp garden knife
-
Measuring tape
You may also want gloves and sturdy shoes to make the work more comfortable.
Step 1: Measure Your Yard and Order Sod
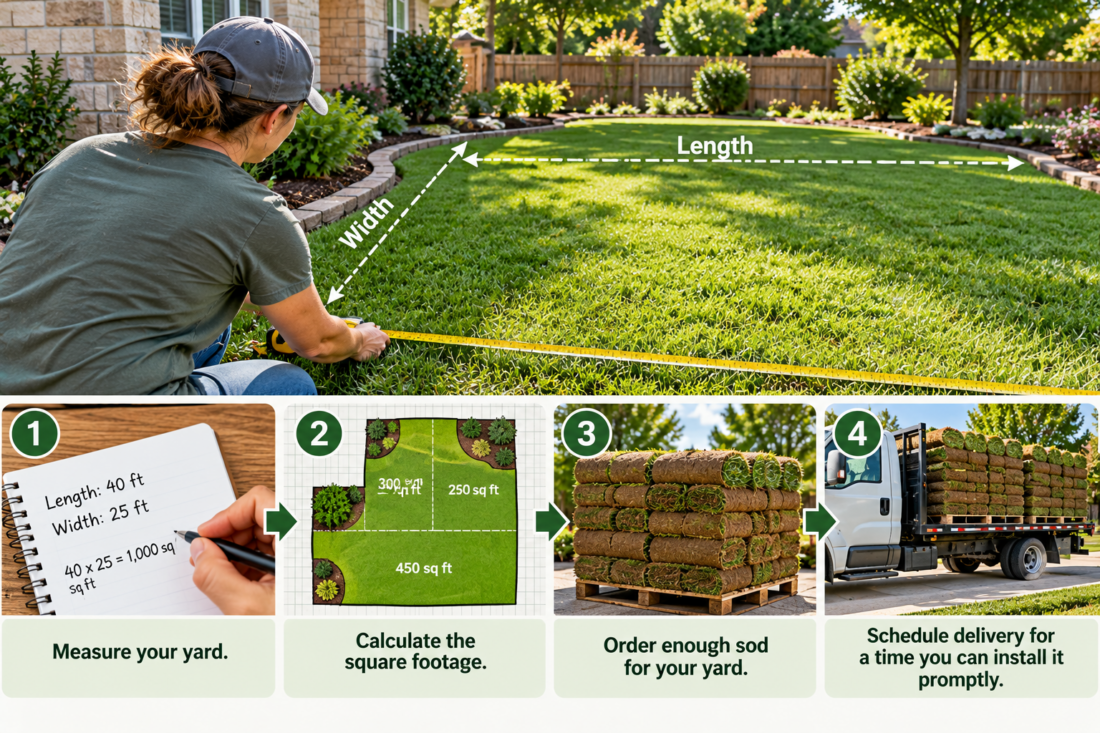
Start by measuring the area where you want to install new grass. Sod is commonly sold by the square foot or by the pallet, so knowing the size of your lawn will help you order the correct amount.
For a rectangular yard, multiply the length by the width to calculate the square footage. If your yard has an irregular shape, divide it into smaller rectangles or squares, measure each section, and add the results together.
Order enough sod to cover the entire area, allowing a little extra for trimming around edges, walkways, and landscaping features.
Helpful tip: Sod is perishable, so arrange delivery for a time when you can install it promptly. Fresh sod is easier to handle and less likely to dry out while you work.
Step 2: Remove Existing Grass, Weeds, and Debris
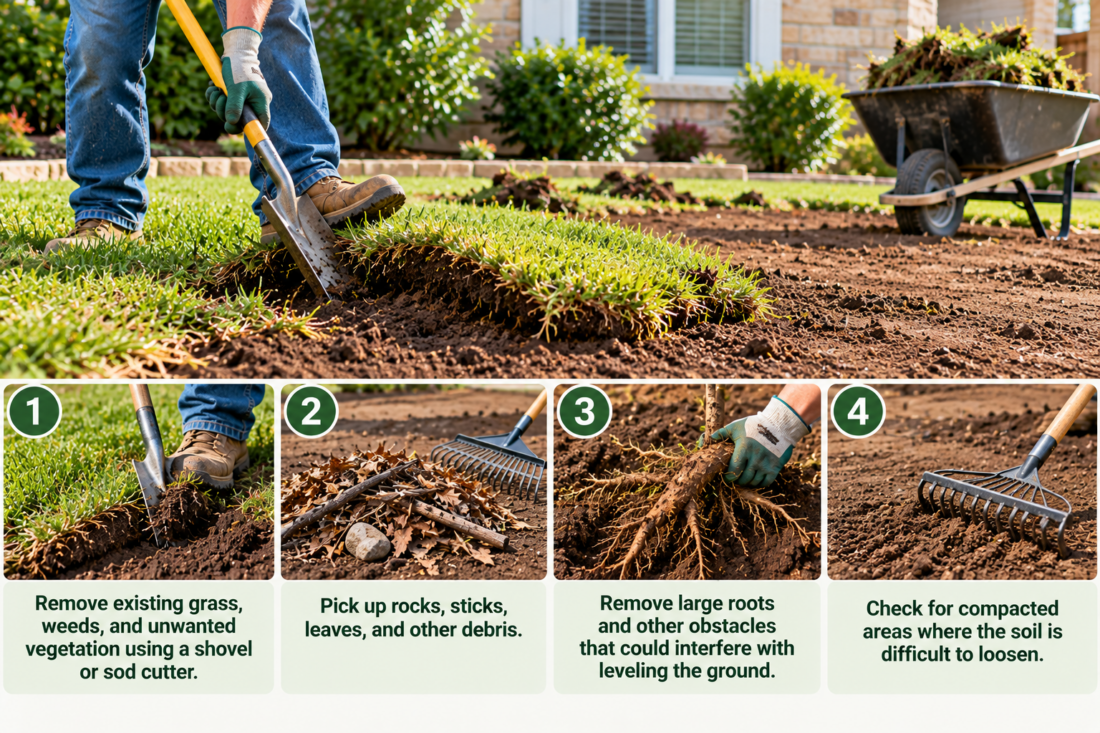
Before laying new sod, clear the installation area. New sod needs direct contact with prepared soil so its roots can grow into the ground below.
Follow these steps:
-
Remove existing grass, weeds, and unwanted vegetation using a shovel or sod cutter.
-
Pick up rocks, sticks, leaves, and other debris.
-
Remove large roots and other obstacles that could interfere with leveling the ground.
-
Check for compacted areas where the soil is difficult to loosen.
Avoid laying new sod directly over existing grass or weeds. These can interfere with root establishment and create an uneven lawn.
Step 3: Prepare the Soil
Healthy soil helps new sod establish strong roots. If the ground is compacted or poor in organic matter, take time to improve it before installation.
Loosen the Soil
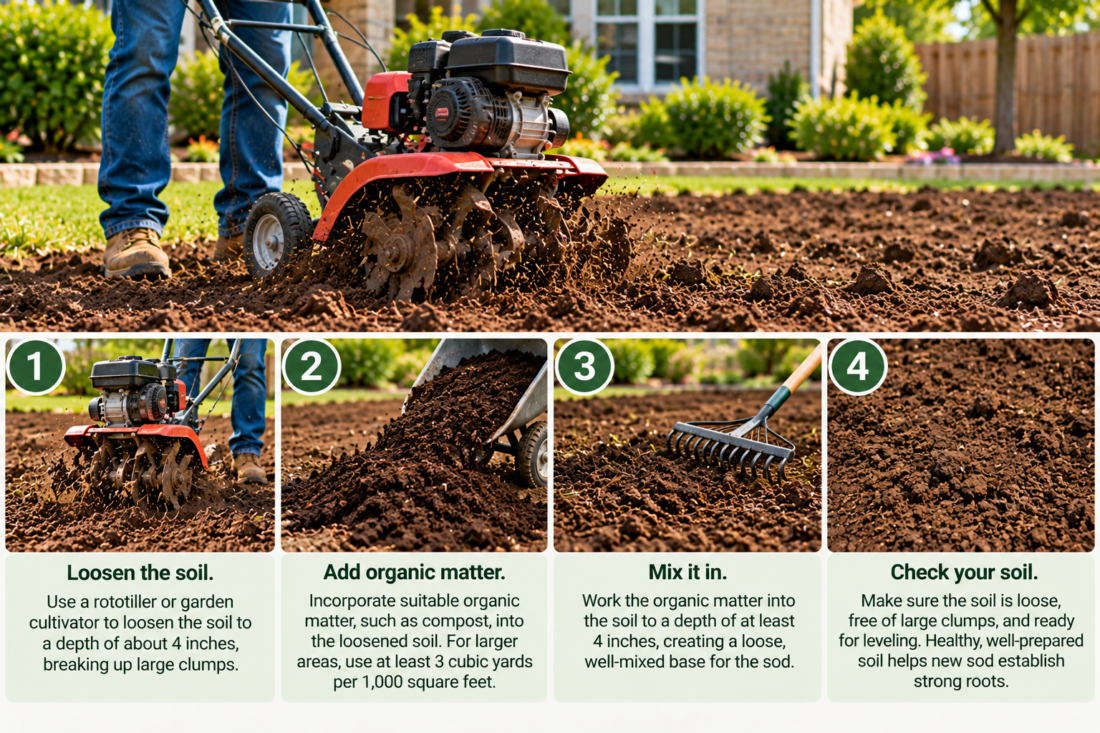
Use a rototiller or garden cultivator to loosen the soil. Work the ground to a depth of approximately four inches, breaking up large clumps as you go.
Loosening the soil helps water move through the root zone and gives the new grass roots room to grow.
Add Organic Matter
If your soil needs improvement, incorporate suitable organic matter into the loosened soil. The amount you need depends on the existing soil and the condition of the planting area.
For a large lawn, Ryno Lawn Care's original preparation guidelines recommend a minimum of three cubic yards of organic material per 1,000 square feet, incorporated into the soil to a depth of at least four inches. Assess your soil before adding amendments to determine what it needs.
In North Texas, clay-heavy soil can be particularly challenging because it may drain slowly or become compacted. Improving the soil structure can help create better growing conditions for your new lawn.
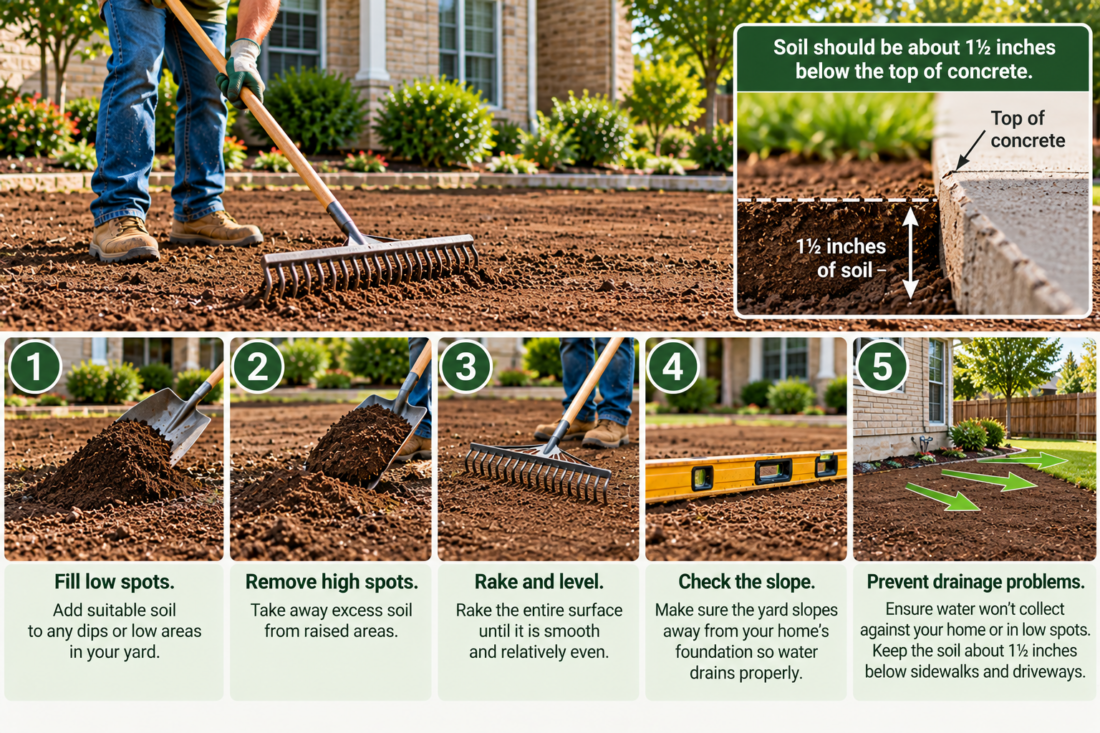
Step 4: Establish the Grade and Level the Yard
Grading means shaping the ground so water drains away from your home and doesn't collect in low spots. Learn more about how to properly grade a lawn.
After preparing the soil, walk over the area and look for dips, bumps, or uneven sections.
-
Fill low spots with suitable soil.
-
Remove excess soil from high areas.
-
Rake the entire surface until it is relatively smooth.
-
Check that the yard slopes away from your home's foundation where appropriate.
-
Make sure water won't collect against buildings or in areas where it could cause drainage problems.
Pay special attention to sidewalks and driveways. The prepared soil should sit approximately 1½ inches below the top of the concrete to account for the thickness of the sod.
Why does this matter? Proper grading helps prevent standing water and makes the finished lawn easier to mow and maintain.
Step 5: Finish Raking the Soil
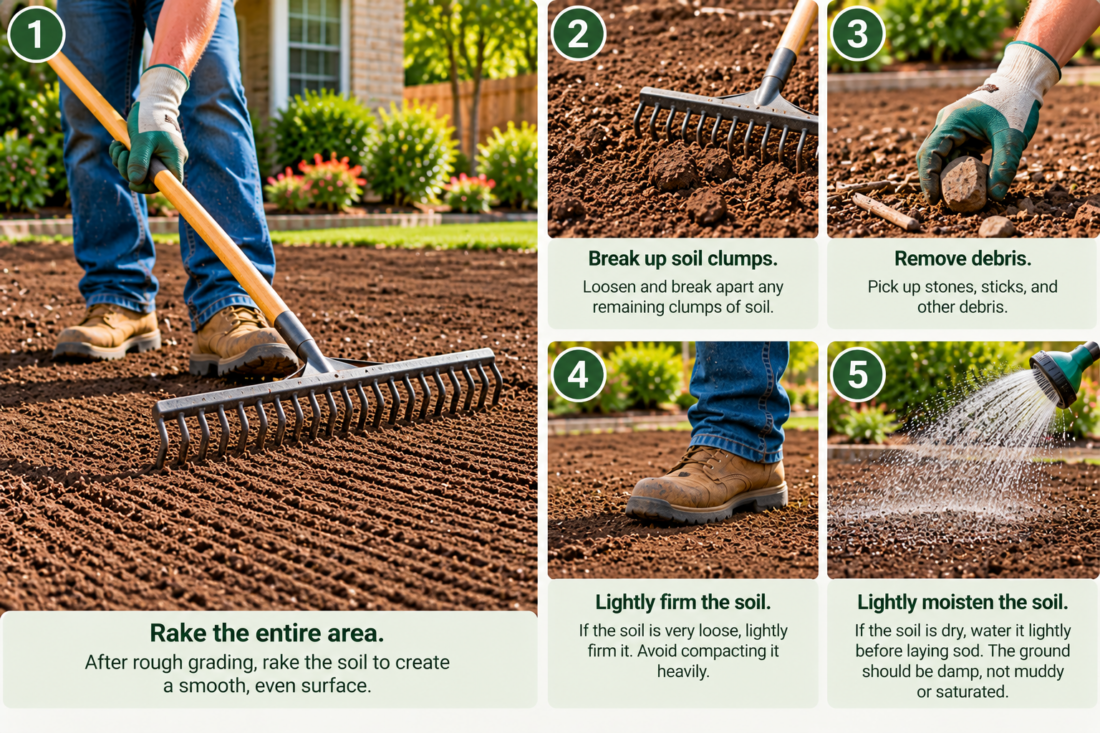
Once the rough grading is complete, rake the entire area one more time. Break apart remaining soil clumps and remove any stones or debris that appear.
The goal is a smooth, even surface without deep footprints, large bumps, or holes.
Lightly firm the soil if it is very loose, but avoid compacting it heavily. You want a stable surface that still allows the new roots to grow.
Before laying the sod, lightly moisten the soil if it is dry. The ground should be damp, not muddy or saturated.
Step 6: Lay the First Row of Sod
Now you're ready to install the grass.
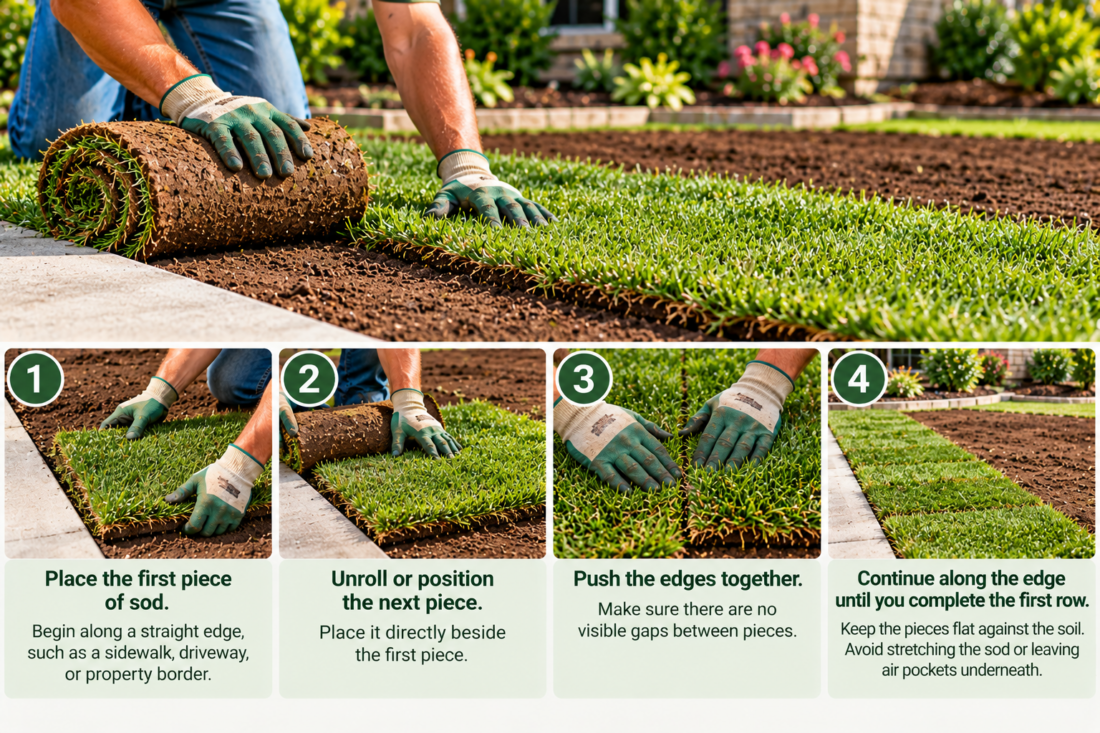
Begin along a straight edge, such as a sidewalk, driveway, or property border. This gives you a guide for laying the first row evenly.
-
Place the first piece of sod on the prepared soil.
-
Unroll or position the next piece directly beside it.
-
Push the edges together so there are no visible gaps.
-
Continue along the edge until you complete the first row.
Keep the pieces flat against the soil. Avoid stretching the sod or leaving air pockets underneath.
If the pieces have curled edges, gently press them into place so the roots make good contact with the ground.
Step 7: Stagger the Seams and Fill the Yard
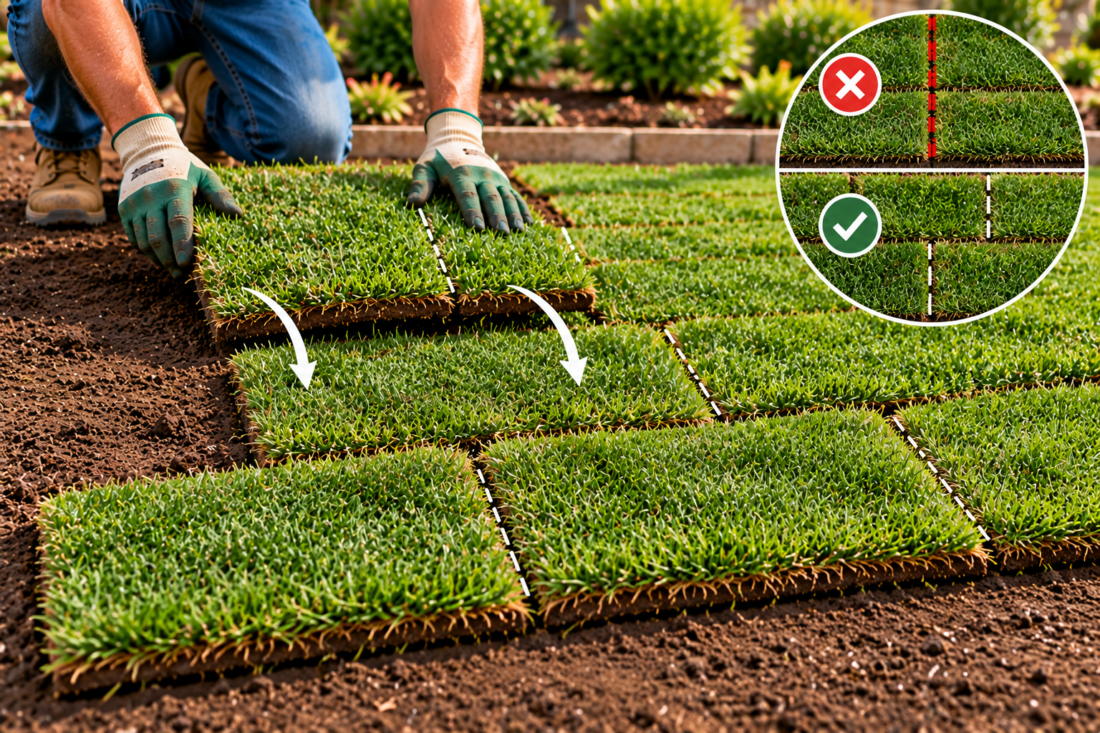
After completing the first row, begin the next row with a shorter piece of sod. This creates a staggered pattern, similar to the way bricks are laid in a wall.
Continue laying the pieces tightly together, making sure the seams in one row don't line up with the seams in the next.
As you work:
-
Keep the edges touching without overlapping.
-
Avoid leaving gaps between pieces.
-
Press the sod gently into place.
-
Work carefully so you don't disturb the prepared soil.
-
Save smaller pieces for trimming around edges, but avoid using tiny scraps that may dry out quickly.
Staggering the seams helps create a more uniform lawn and reduces the appearance of long, continuous lines between pieces.
Step 8: Cut Sod Around Edges and Obstacles
You may need to trim sod around trees, flower beds, sprinkler heads, sidewalks, and other features.
Lay the piece over the area you need to cover, then use a sharp utility knife or garden knife to cut it to the correct shape.
Make careful cuts and avoid damaging irrigation lines or other underground utilities.
When fitting sod around trees, leave the appropriate space around the trunk rather than piling grass or soil against the bark.
Not sure which type of sod you need? Read "What Type of Grass is Best for Your Lawn"to find out.
Step 9: Water the New Sod Thoroughly
Watering is one of the most important parts of sod installation. Fresh sod needs moisture to keep the grass healthy while its roots begin growing into the soil below.
As soon as you finish laying a section, water it thoroughly. If possible, begin watering immediately after installation rather than waiting until the entire yard is complete.
The goal is to moisten both the sod and the soil underneath it.
Check the soil beneath a corner of the sod to make sure water has reached the root zone. It should feel moist, not dry or muddy.
During the first few weeks, check your new lawn frequently. Fresh sod can dry out quickly, especially during warm, sunny, or windy weather. Adjust watering based on rainfall, temperatures, soil conditions, and how quickly the sod is establishing roots.
Avoid allowing the new sod to dry out, but don't keep it constantly waterlogged either.
Step 10: Check Your Work and Help the Roots Establish
After installation and initial watering, inspect the lawn for loose edges, gaps, and uneven sections.
If you have a lawn roller, you can use it lightly on the newly installed sod to improve contact between the roots and the soil. Avoid excessive rolling, especially when the soil is wet, because this can compact the ground.
For the next several weeks:
-
Keep the sod and underlying soil appropriately moist.
-
Limit foot traffic while the roots establish.
-
Check edges and seams for drying.
-
Watch for areas that aren't rooting properly.
-
Follow the sod supplier's recommendations for the grass variety you installed.
To check whether the sod is taking root, gently tug on a corner. If it resists lifting, the roots may be beginning to anchor into the soil.
Wait until the grass is established before returning to your regular lawn maintenance routine. Follow the supplier's guidance for the first mowing and avoid cutting off too much grass at once.
Common Sod Installation Mistakes to Avoid
Even a carefully installed lawn can struggle if a few important steps are overlooked.
Skipping soil preparation: Laying sod over compacted soil, weeds, or debris can prevent roots from establishing properly.
Leaving low spots: Uneven grading can lead to puddles, drainage issues, and an irregular lawn surface.
Leaving gaps between pieces: Open seams can dry out and leave visible lines in the finished lawn.
Waiting too long to water: Fresh sod can dry out quickly, particularly in hot weather.
Overwatering: Constantly saturated soil can deprive roots of oxygen and contribute to root problems.
Walking on new sod too soon: Excessive foot traffic can shift the pieces and damage the developing root system.
Taking your time during preparation and installation can help you avoid these problems and give your new lawn a better start.
Should You Install Sod Yourself or Hire a Professional?
Installing sod yourself can be a rewarding project, particularly for a small, relatively level lawn. However, larger yards or properties with significant grading, drainage, or soil problems may require more equipment and preparation.
Professional sod installation can help take the work off your hands, from preparing the soil and correcting uneven areas to laying the grass and getting the lawn ready for establishment.
Ryno Lawn Care provides premium sod installation services for homeowners who want help creating a fresh, healthy lawn.
Frequently Asked Questions About Installing Sod
How long does it take to install sod?
The time required depends on the size of the yard, the condition of the soil, and how much preparation is needed. A small, level area may be completed relatively quickly, while a large yard requiring grading and soil improvements can take considerably longer.
Should I water the soil before laying sod?
If the prepared soil is dry, lightly moisten it before installation. Avoid making the ground muddy or saturated, because the sod needs good contact with the soil without sitting in excess water.
Can I lay sod over existing grass?
It's best to remove existing grass and weeds before installing sod. This allows the new roots to contact the prepared soil and reduces competition from unwanted vegetation.
How do I know if my new sod is rooting?
Gently tug on a corner of the sod. If it resists lifting, the roots may be starting to establish. Avoid repeatedly pulling up the sod, since disturbing it can interfere with root growth.
How soon can I mow new sod?
Wait until the sod has begun to root and is stable enough to resist lifting or shifting. Follow the supplier's recommendations for your grass variety, and make sure the lawn is firm enough to mow without leaving ruts.
Give Your Lawn a Fresh Start With Sod Installation
A healthy new lawn starts with proper preparation. Removing weeds and debris, improving the soil, correcting low spots, laying sod tightly, and watering consistently all help create the conditions new grass needs to establish.
Whether you're replacing a damaged lawn or starting fresh, following these steps can help you approach sod installation with confidence.
If you'd prefer professional help, visit Ryno Lawn Care's premium sod installation page to learn more about getting a new lawn installed.

Blog Admin
Hello, hope you enjoy these blog posts and get some useful lawn care tips from reading the info. Let me know if you have any questions or comments below.
Comments (1)
I didn’t see the video but is sod something that I can really install myself or is it best left up to the pros like you guys? It doesn’t seem that difficult but I’m not very good at landscaping aside from mowing and edging.